
The summer heat is all but gone, and fall is right around the corner. We're all enjoying the fruits of our labor from our gardens and flower beds; it is that wonderful harvest time again!
Now that being said, right after the beautiful colors of fall and harvest is the crisp and cold of winter, which will certainly be here before we know it.
Dear gardeners, never fear, we are here to make the transition from fall to winter as easy as we can for you! No matter what type of gardener you are, whether a newbie or seasoned professional, these easy-to-follow steps are sure to make the process easy and pain-free.

Step 1: Weeding and Pulling
Firstly, let's clean out those beds and rid them of any weeds. It is also time to pull out any bulbs (like dahlias and cannas) that won't survive the winter and prepare them for storage. We also all know that using the right tools for the job will make it so much easier. Especially when it's something back-breaking like weeding. Not only is it hard on your hands but can be hard on your back and knees too. The right pair of gloves and a back-saving tool can make all the difference in this often tedious task.

STEP 2: Planting
If you're new to gardening, you may think this is a typo. But in fact, this time of year is great for planting a variety of things to enjoy come spring. In your existing beds, this is a great time to make room for any new shrubs as well as cut back and divide your perennials. It's also time to plant your fall bulbs like tulips, daffodils, hyacinths, and crocuses. These can all be planted now to enjoy come spring. And of course, this is the time of year to also plant your GARLIC.
Step 3: Water
Now, this step isn't quite as self-explanatory as you'd think. Unlike in the spring and summer, you are obviously not going to be watering your garden during winter months. But before you shut down your sprinklers before frost, we recommend a good soak one last time before shutting your watering down for winter.
STEP 4: Cover Up
Newly planted shrubs, trees, or plants that are less hardy may need to be covered before the cold hits. This can be easily done with burlap and twine. You may also consider covering any new garden beds that you are trying to establish, especially if you're wanting to manage your hardiness zone and require some extra protection from cold and snow.
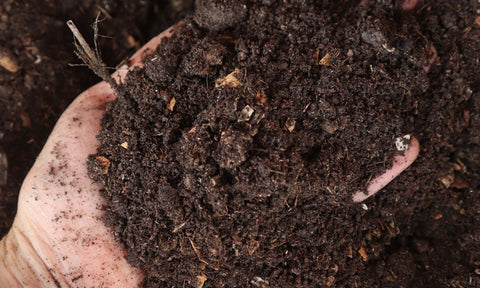
Step 5: Soil Solutions
Sometimes our soil needs a little help by way of soil amendments. For example, sometimes our soil can be too acidic, sometimes not acidic enough. There are things that you can amend your soil with that will help fix your soil for the spring. Another way to give your soil a leg up and protect it from disease and pests is to plant a cover crop such as winter rye grass. This plant that you can remove in the spring offers a level of protection and assists in weed suppression, which is always a bonus!

STEP 6: MULCH
While mulching can help in the spring, it can definitely be a help to get our gardens ready for winter too. Along with cover crops and straw, mulching can help suppress weeds as well as provide a layer of insulation to maintain a consistent temperature and protect your plants from varying cycles of freezing and thawing.
By following these easy steps to winterize, your garden will reward you come spring. If you have more questions, our knowledgeable staff here at Purity Feed are always at the ready with answers and recommendations for any of your winterizing needs. They have years of expertise under their belts whether you need a soil amendment or you’re ready to start your plot of garlic, they’re always there to help.